RISE Customer Portal: Manage Team Guide
Please refer to this document when performing Team Management tasks on the RISE Customer Portal.
The Team Management features enable team owners to invite and manage additional members to delegate responsibilities while ensuring that only authorized agents have access to relevant data for their role. Also, remove agents who are no longer affiliated with the organization from the portal's access list.
Agent Invitation
Follow these steps to invite users to be agents to your account:
- In your profile go to the Account Settings >Team>Manage Team and find the Add Team Member button.

- Click the Add Team Member and fill out the form.

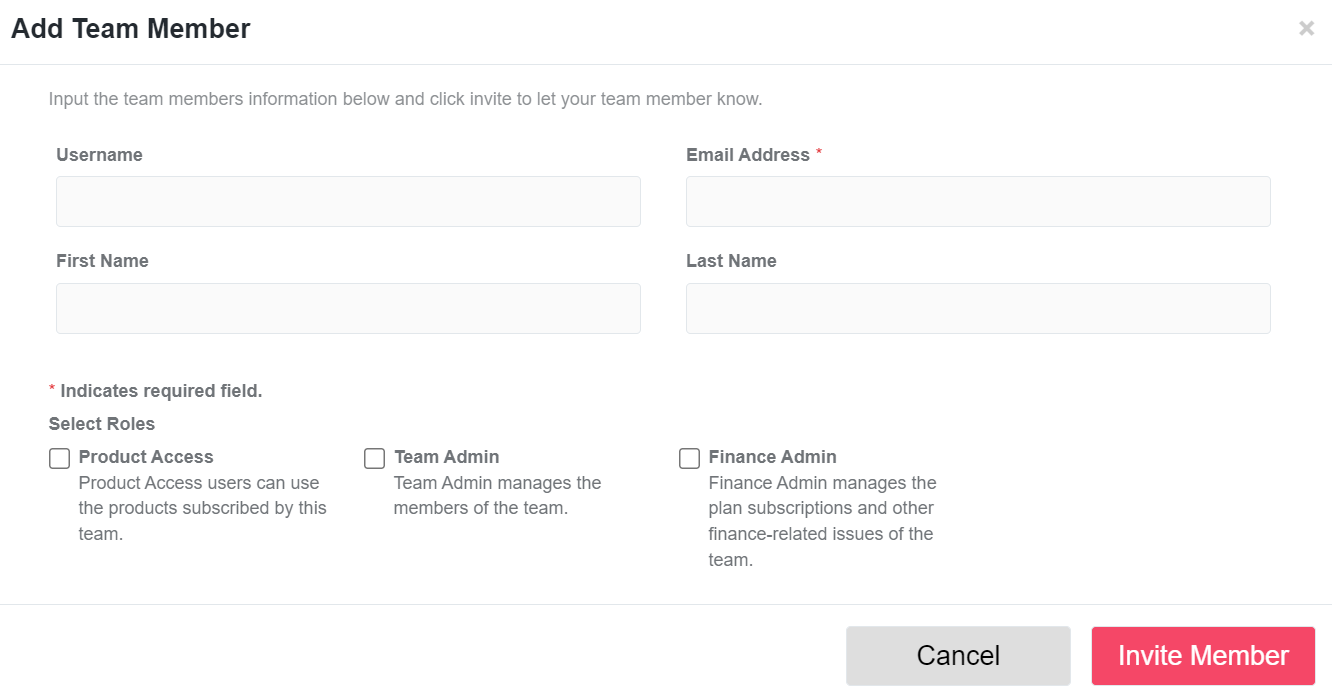
3. Choose a role or roles for the agent you are about to invite. This will determine which features and what data this agent will have access to.
4. When everything is set, click the Invite Member button to send an email invitation to the email address you entered.
Your recently invited member should now be found on the Active Agents table.
Edit Agent
As a team owner, you can also edit a team member's account information and remove or add roles to active agents.
To edit an agent’s account you will need to:
- Go to the Account Settings >Team>Manage Team and search for the Agent you would like to edit
- The edit agent feature should be found in the actions column on the far right side of the table.


3. Clicking the edit feature will open the form that will allow you to edit their information and remove or add roles.
Resending Invite Link or Transfer Ownership
If the team owner needs to transfer ownership to an active team member or resend the link, simply click the gear icon of the team member and select the option you want to perform.

Agent Deactivation
If a member is no longer associated with the organization, you can deactivate their account to prevent them from accessing the portal and the data it contains.
To deactivate an agent’s account you will need to:
- Go to the Account Settings >Team>Manage Team and search for the Agent you would like to deactivate.
- Select the member by ticking the checkbox found on the left most column. Doing so will reveal the “Deactivate” option. You can deactivate multiple agents at once by checking their checkboxes.
 Once ready, go ahead and deactivate the agent.
- If the procedure is successful, the agent will be moved to the Inactive Agents table and will no longer be able to access the admin portal.
 Once ready, go ahead and deactivate the agent.